The living room project
We decided that the dining room was long overdue for some attention: the room has three outside walls of double brick construction and a suspended floor.
The main problems with the room, apart from being a cold room, were problems caused by an error in the original construction of the suspended floor and problems cause by 'home improvements' which had breached the damp proof course.
The work undertaken on the room was pretty major. The photos and comments below go through the latter stages of the work (the bits we hadn't planned on doing)
In the first instance, after consultation with our plasterer, we decided that re-plastering the room with insulated plaster board was in order and we stripped the walls back to bare brick. On a house which is over a hundred years old this isn't a major task as the plaster tends to come off in pretty big pieces when hit with a cross peen hammer.
We have 3.5kg SDS drill with rotary stop but only used this for cleaning up one or two hard spots: the fan on the drill's motor tends to spread the dust a lot further than the hitting it with a hammer method and it's all too easy to damage the brickwork if your not careful (and lets face it, when the job's on and you want to get done as soon as then careful sort of takes a back seat!)
(We forgot to photograph this bit but just think bare brick walls, heaps of plaster all round the edges of the room and a filthy, dirty me in middle of it all wearing, naturally, the correct safety gear)
Next up was a review of where the electrical sockets: where they were, where we wanted them to be and how many we wanted. This was important as there is no way we are going to be chasing cables into the newly plastered walls after the event.
The existing ring main in the room was partially dismantled, the socket positions chosen and the first fix carried out. The addition of one new socket meant that we didn't have to draw the wires back to sockets in other rooms to make the changes; the additional socket acts as a junction box to allow the cables in the room to be replaced without breaking the ring main or using a unserviceable junction box under the floor (because once the new floor is down it isn't coming up again)
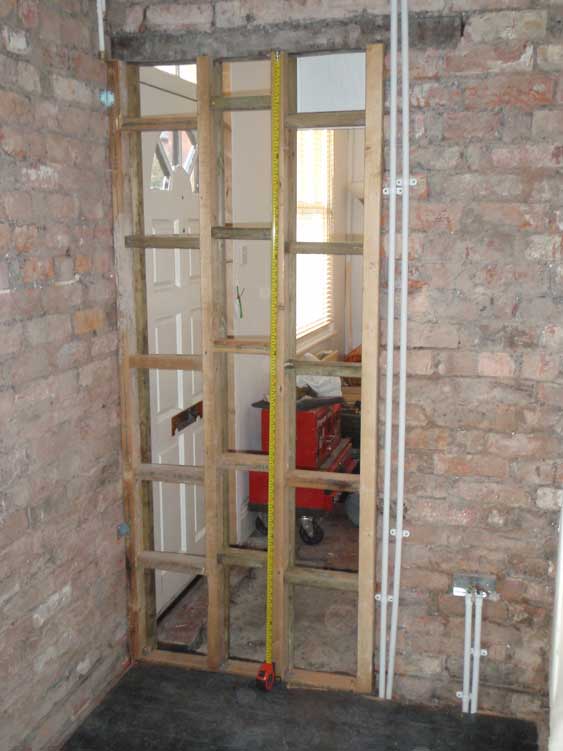
We took the opportunity to lose one of the doors into the dining room; the room is only three metres by four metres; the second door always seemed to be superfluous, we never used and it seemed to make it very difficult to arrange furniture sensibly within the room.
I built my first stud wall. Too many studs, too many noggins but very stiff. Covering it was left for Rob the plasterer to take care of...
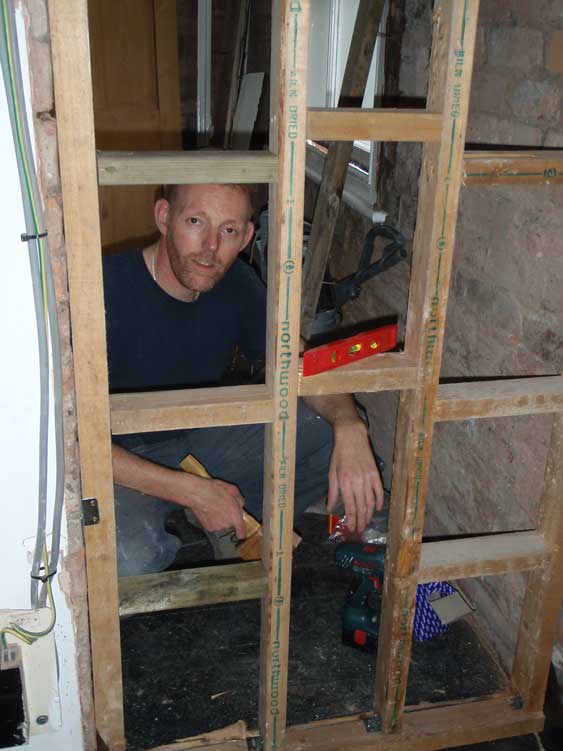
I probably paid too much attention to how the wall was built; each of the noggins was leveled before nailing it in!
Rob then came in (whilst we were away on holiday) and put the insulated plaster on the walls. He left the new boards 50mm shy of the floor at our request since we planned to replace the old flooring and knew that if the plaster was brought too close to the floor it would be damaged during the floor board removal. We'll insert a polystyrene batten around the bottom of the plaster boards, prior to fitting the new skirting boards, to prevent a cold spot a floor level.
We then waited a couple more weeks for the plaster to dry, very frustrating when you want to get on with the job but very necessary when you want the plaster to stay put and last a while!
With the plaster dry we gave the walls a couple of coats of brilliant white emulsion paint. This isn't the final colour we'll be using but seals the plaster and gives a good surface to paint our chosen colour onto (so it comes out looking like the shade on the colour chart).
Next task was to take up the old flooring.
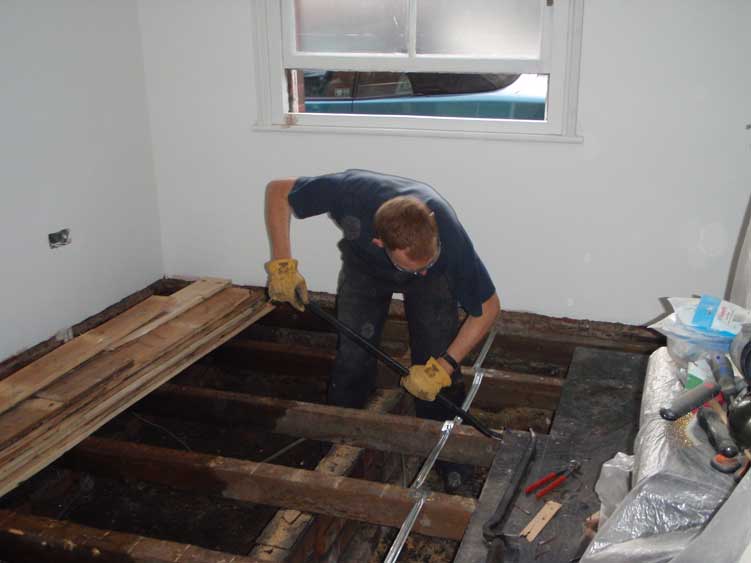
We'd done a bit of remedial work on this floor in the past: in hindsight it was a waste of time and effort as the joists were in a pretty poor state due to a combination of woodworm, wet rot and general age. Once the floor board were off the very poor state of the joists was apparent and we decided that it would be a highly unsatisfactory job to put the new flooring on top of such a poor setup.
The old joists were removed and converted into a form more useful too us:
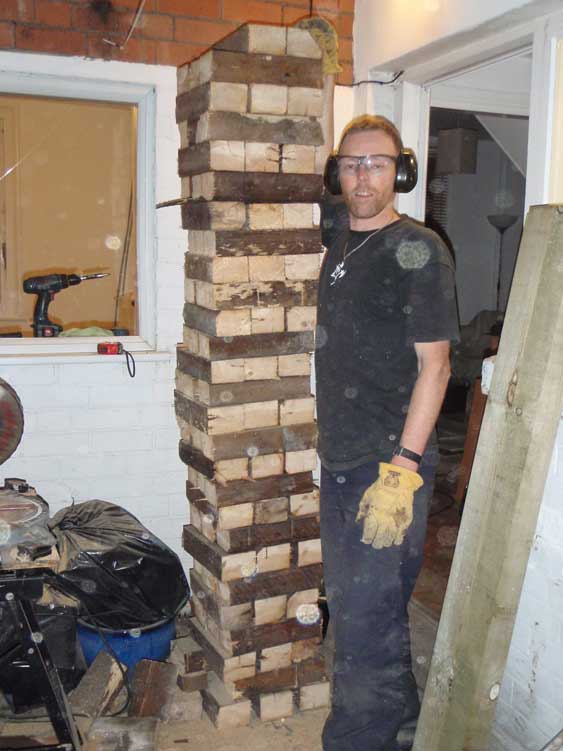
No, not a giant Jenga set, but a decent stack of logs to feed our wood burners with! The floor boards will be recycled into kindling as required.
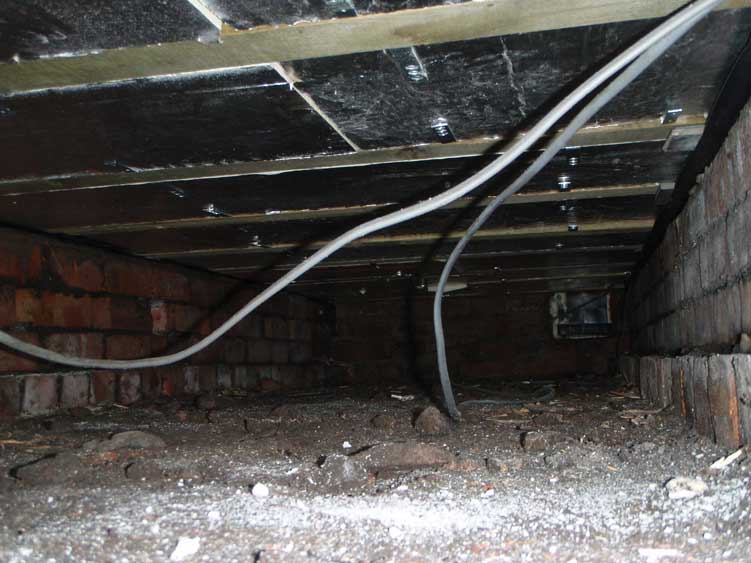
With the floor out of the way we took the opportunity to fit telescopic air vents to the existing air bricks. The purpose of these is to bring the very necessary ventilating air down to the sub floor rather than having directed onto the sides of the joists. This serves two purposes, a) it means that the air flow goes over the sub-floor to remove any damp b) it stops the cold air from traveling directly across the underside of the floor ( which tends to make the floor very cold and promotes damp).
The telescopic vents are really cheap and cost about £2.50 each from Screwfix. We used expanding foam to both fill the gaps around the join with the air brick and to hold the vents in place.
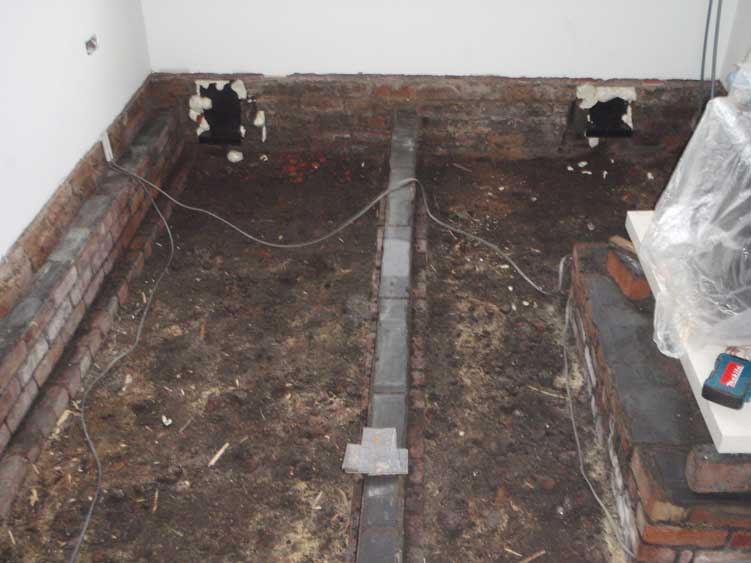
Another worthwhile job to do whilst the sub floor is this exposed is to have a really good clean out and remove and loose materials or bits of wood left behind by previous works. A job we could (and should have done, had time permitted) would have been to 'blind' the crushed rubble sub-floor with a thin layer of concrete to reduce the passage of moisture. Our thinking was that with the air bricks all cleaned out thoroughly we shouldn't have a problem with damp any more. The building has only suffered in the past decade or so since the house was draft proofed and had various badly executed DIY projects done to it.
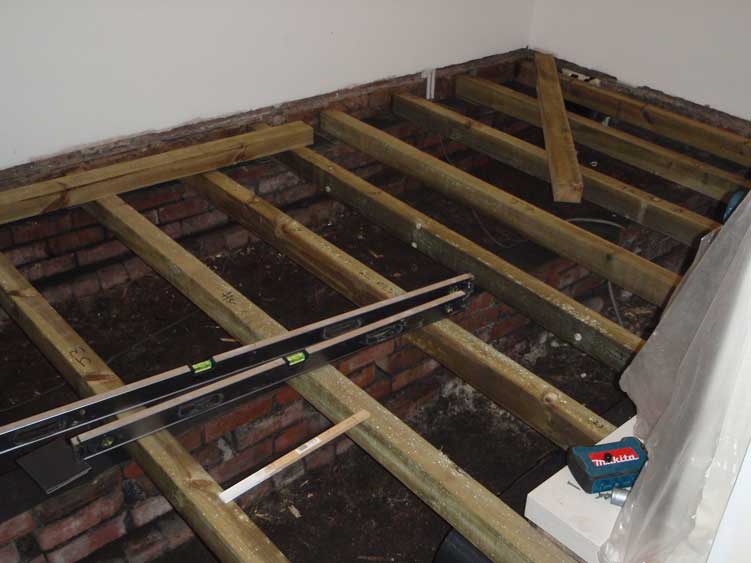
New joists in place and being leveled: We replaced the slate damp proof course on the top of the dwarf walls with a polythene DPC and used cut slates to level the joists along their lengths first then joist to joist after. This job takes a little time but doing it correctly is essential if you want a straight, creak free floor.
Use long spirit levels to get accurate levels across a number of joists.
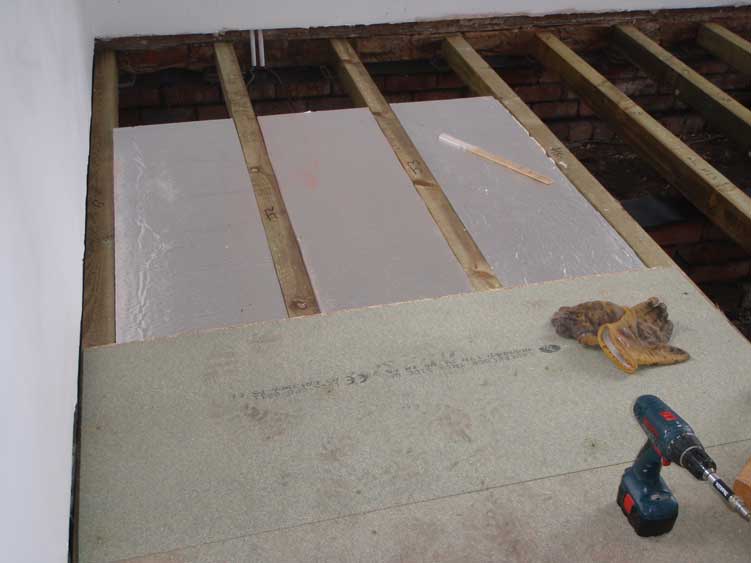
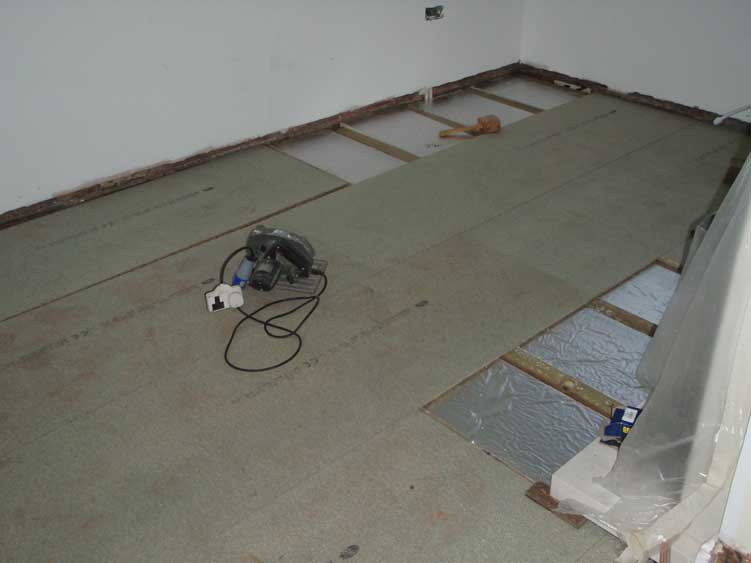
One of the biggest problems we found was that of not disturbing the leveled joists once in position. The first four joists were insulated with 100mm thick 'Kingspan' rigid insulation. The Kingspan is supported at regular intervals on galvanized L brackets fixed to the joists with stainless steel fixings.(Galv square nails would probably be OK but we didn't want to be hammering our carefully positioned joists). As soon as we could we began to fix down tongue and groove chip board sheeting. The engineered Oak flooring we're going to lay doesn't need this but it gave us a work platform to continue some of the other jobs we had to do and it locked all the joists together nicely. Using the chipboard also means that we don't have to worry about making sure the ends of the engineered Oak coincide with a joist meaning we will waste less. The other problem with room is that it isn't square; the back back wall is longer than the front wall so we have to cope with a tapered board at the edge of the room. With joists only we would have had to build a bit of a jigsaw to ensure that we didn't end up with a thin sliver of board with no support. With the chipboard in place we can have a finely tapered piece of engineered Oak at the edge without worrying about support.
Getting there!
The view of the underside of the new floor prior to putting the last piece of Kingspan in place. The white dust in the foreground is the sawdust from cutting the Kingspan to size. Using a chalk line to give a line to cut to and a fine toothed wood saw (Screwfix throwaway type) gave us the neatest results.
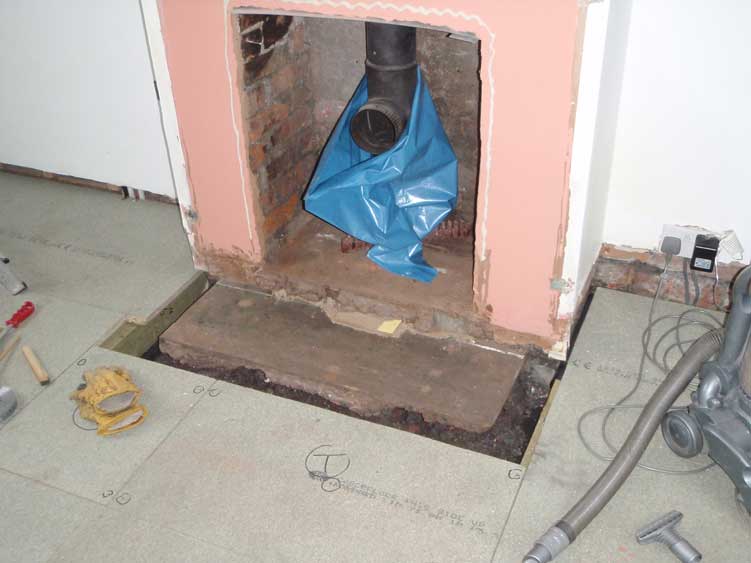
Once we'd removed the old (actually fairly new, fitted in 2006 by the previous house owners) fire surround we exposed the hearth and the cause of the damp in the sides of the chimney breast became obvious: where the back of the hearth was raised the damp proof course had been breached allowing damp to track up the chimney breast. The only way forward was to remove the addition to the hearth. The original structural hearth was in a poor state too so we dug the whole thing out and started again. The pictures below show the progress starting with the crushed rubble being removed:
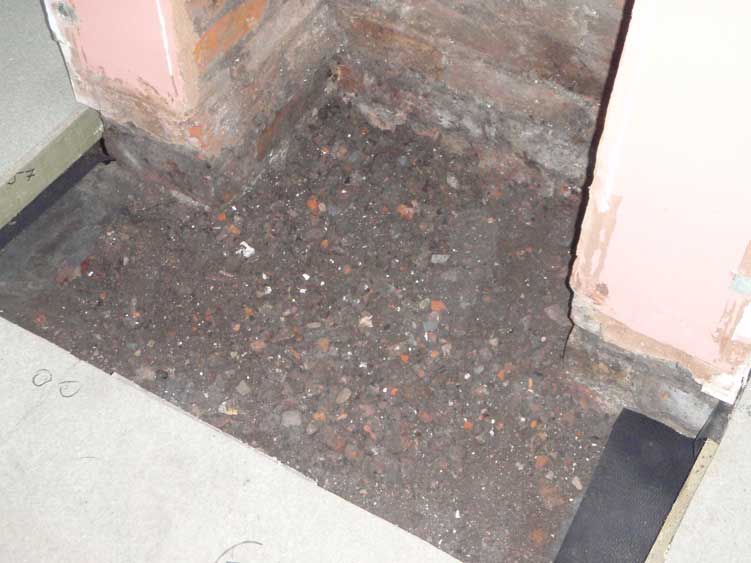
Next we fitted the shuttering and blinded the bottom of the hole with soft sand to protect the damp proof membrane from puncture.

The damp proof membrane was fitted (we used the heaviest grade, 1200 micron, but in the event this was a bad choice as the membrane was difficult to fold into the corners and left folds in the finished hearth.) and the hole partially filled with crushed rubble. The bricks were placed in the hole to try to push the membrane into the corners.

Next we poured the concrete and leveled it. The front part of the hearth was done with a tamping beam but the back had to be poked to settle it in and then hand floated with a plastering trowel.
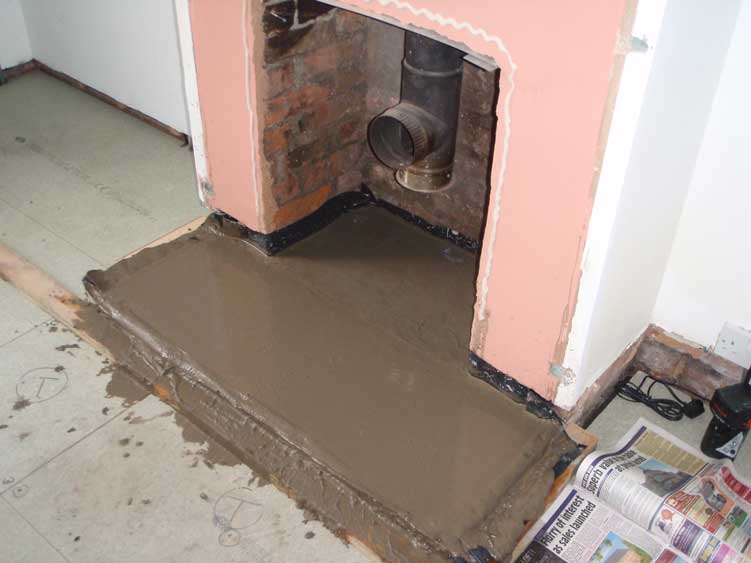
The membrane was carried up the wall so as to be above the level of the new hearth. The excess will be trimmed off after the form work is struck.
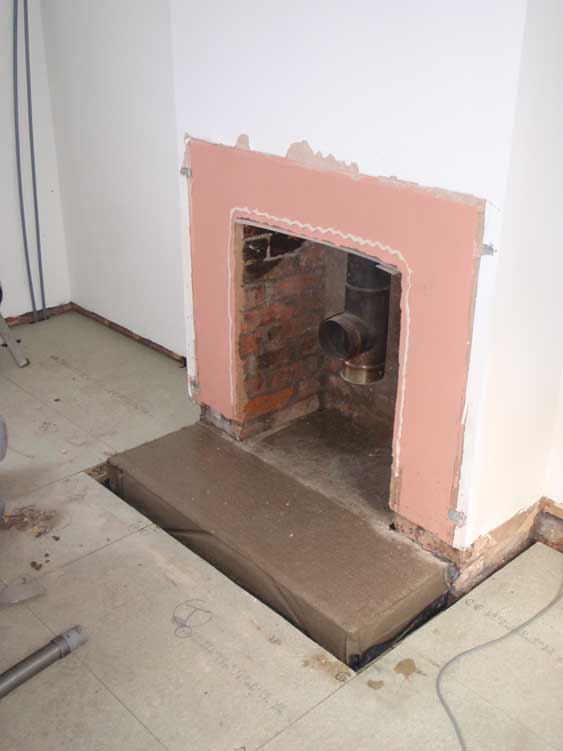
Formwork struck and the damp proof membrane trimmed off. Note the big creases in the concrete at the front of the hearth caused by the heavy damp proof membrane. We took the opportunity to increase the depth of the hearth a little to make sure that ash didn't fall from the door of the stove when it was opened (onto the new floor). We've also increased the height of the hearth to take account of the increased floor thickness ( and maintain the required 500 mm height for the hearth) The amount of concrete poured easily fulfills the 125 mm thickness required by building regulations.
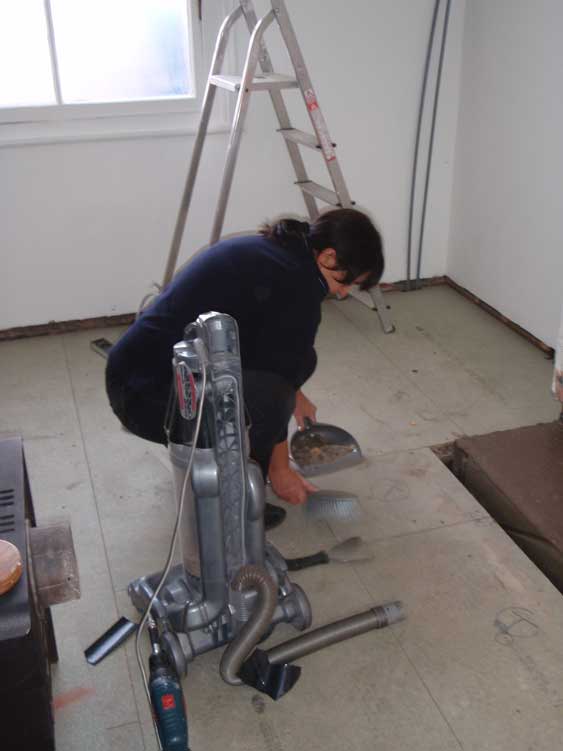
The important bit: cleaning up (Julie seems to do a lot of that!)
After a week or so we decided that the concrete had dried sufficiently for for us to start to tile the hearth mainly because we wanted to get the wood burner back into the fire place so we could stop tripping over it.
Handy hint: Ask around your friends before going out and buying a tile cutter: I asked at work and was offered the use of five different machines. Somebody near you has bought one of these for a job and will save you having to pay out £30-£40 for your own. The electric tile cutters make cutting thick floor tiles an easy job. I was able to cut a slate tile to size in less than thirty seconds.
Give the machine a good clean before you give it back and they'll think you've done them a favour!
We had also changed the flu position from back exit to top exit. This has allowed us to push the wood burner further back into the hearth. This particular model has a convection skin and the back of the stove remains relatively cool. There is no combustible material next to the stove either. The guy who originally installed the stove is going to come and check out the installation for me. I've installed it to his guidelines but it will be good to have someone on the HETAS register check it out for me.
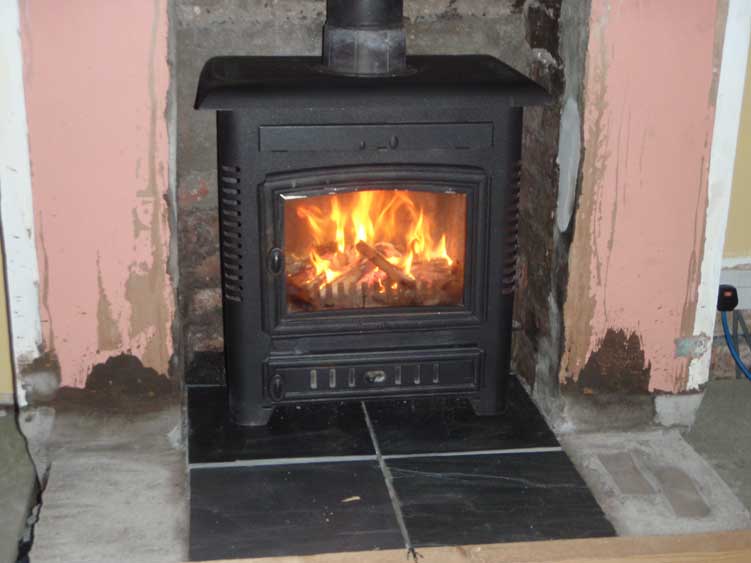
Still a lot of work to do but we wanted to see a fire in the stove...
We positioned the stove back into the hole by putting two pieces of damp proof course tape on top of each other at each side of the stove.
This allowed us push the stove back into position with very little effort and without damage to the new slate tiles.
Here's the completed hearth with surround and grouted tiles:
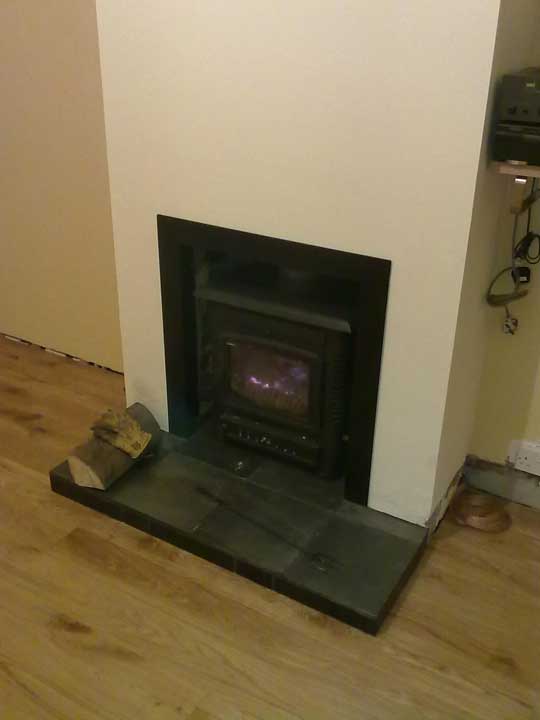
We made a surround for the fireplace to cover the rough edges of the plaster. This is 80 (mm) x 80 x 3 mild steel, painted with a high temperature matt black paint and secured into the hole with four screws. The fit was good enough that these screws were not really necessary but I didn't want the steel work falling out at any point. The fireplace already has a concrete lintel supporting it; this steel has no other purpose than hiding the raggedness of the hole.
More to type in here but I wanted to put this picture of the new, engineered oak floor being sealed. We're nearly there..!
The flooring has been sealed with a product called 'Granglaze' which is a modified polyurethane varnish with wood oil. It goes on easily, feeds the wood and seals it. The end result is a very hard seal which protects the oak. The only slight problem we encountered with the Grangalze was that if you apply it too thickly it tends to leave dimples. We sanded these off and applied another layer and all came out well.
Whilst laying the flooring I was absolutely anal about not treading on the boards directly. I laid heavy dust sheets over the floor as I laid it so I didn't tread any dirt onto the unsealed oak even though I new we would be lightly sanding the floor prior to sealing it.. Trainers have a habit of leaving dark marks if you twist on them (check out the rules regarding footwear at most squash courts)

We sealed the gap at the bottom of the new plaster board with expanded polystyrene. This is to prevent the draught generated by the cold of the outside wall from falling down into the room. The polystyrene doesn't go all the way to the wall but is wedged between the chipboard subfloor and the bottom edge of the plaster board allowing some air circulation behind the plaster board. The engineered oak flooring is butted up to the polystyrene.
I've read lots about leaving a 10 mm gap all the way round the floor when laying a laminate (ugh!) floor but can't see the point of this. The floor is screwed down every 300 mm on every board (as per the manufacturer's instructions), the room is not damp so where is 20mm worth of expansion coming from? The polystyrene will take care of any expansion which manages to rip all the screws out...
In terms of the board fixings I have a 'secret' nailing tool (Portanailer for those looking to buy or rent one) but decided not to use this for two reasons, a) I'm not that experienced with using it and didn't want to practice on my new floor and b) Screwfix sell a special screw called a 'Tongue tite' which does the same job as a secret nail (i.e.drives in through the tongue of the board so is invisible in the finished floor). The screws are absolutely brilliant to use, they come with a special bit to drive them (one in each box of 200 screws), they drive easily, pull the boards tight as they drive in and, if the worse comes to the worse, can be unscrewed without damaging the flooring. The only word of warning about them is that if used closer to a board end than 50 mm the manufacturers recommend pilot drilling to avoid splitting the end of the board.
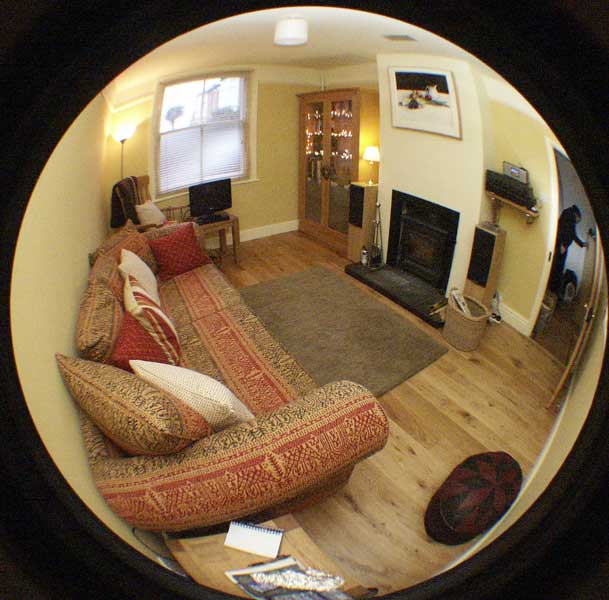
The rest of the room has been detailing (furnishings mostly) but the end result has been very pleasing; we've ended up with a nice balance of traditional with contemporary styles and the room is a very pleasant retreat when the fire is lit and the room warmed up (we still haven't refitted the original radiator despite the recent (Dec 2010) extremely cold weather)
Below id the completed room (picture taken with a fisheye lens so as to get the whole lot into one photo):
© Copyright 2024 D G Q Services Ltd